Assembling a YangTze kite
A YangTze kite consists of a tail with a small lifting ‘head’: the Eye Phi.
The Eye Phi frame gives a built-in dihedral on the sail and then the sail gives enough stability and lift for the long tail.
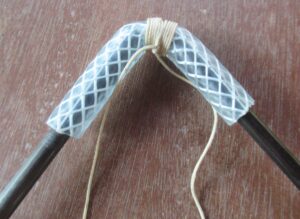
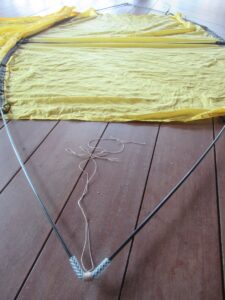
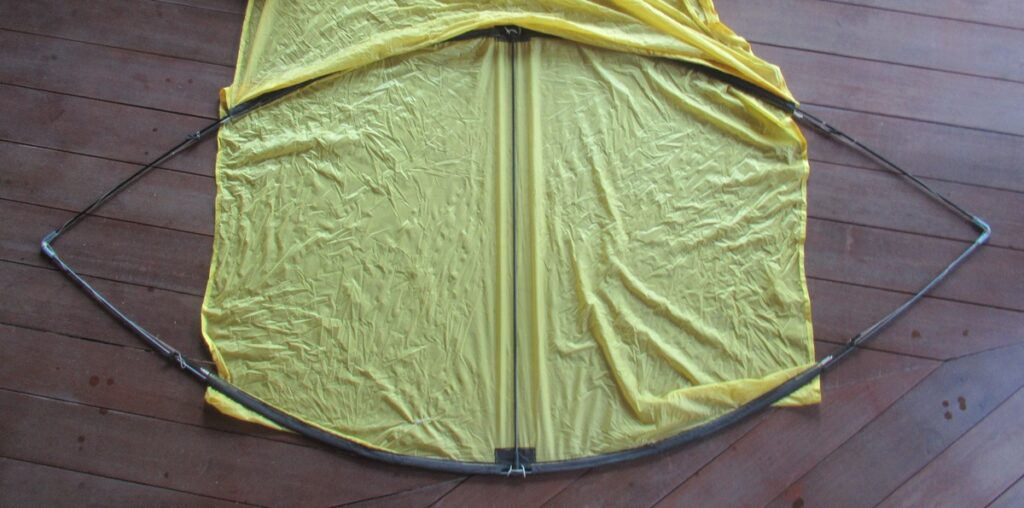
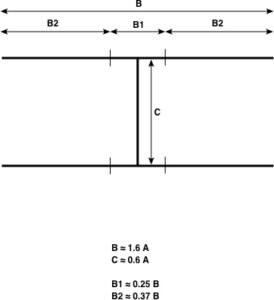 The frame is the capital letter H turned 90°. | 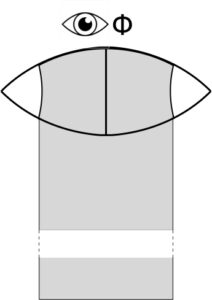 Eye Phi. When a straight sail is applied onto the frame and the tips of the frame spars are joined a dihedral is created on the sail. |
| The Pieces | |
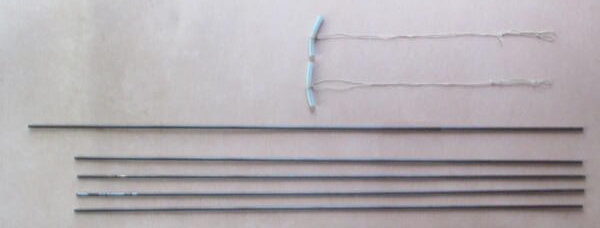 The frame of a YangTze kite consists of four side wing spars (6 mm tubes for the 30 m YangTze and 4 mm rods for the 15 m YangTze) and a spine (rod). Furthermore there are two reinforced plastic tubes with strings tied onto them. |
|
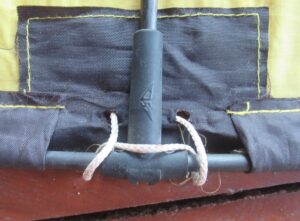
 The sail head has two sleeves for the wing spars: one along the leading edge and one 100 cm (or 59 cm for the 15 m tail) down the sail. In the centre of the sleeves there are short centre spars with ferrules in each end. These centre spars are normally not to be dismantled or removed. | 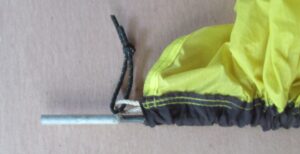 The picture shows a ferrule in one end of the centre rod after the sleeve has been pulled down. It is important when assembling the frame that the wing spars are inserted to the bottom of the ferrules. |
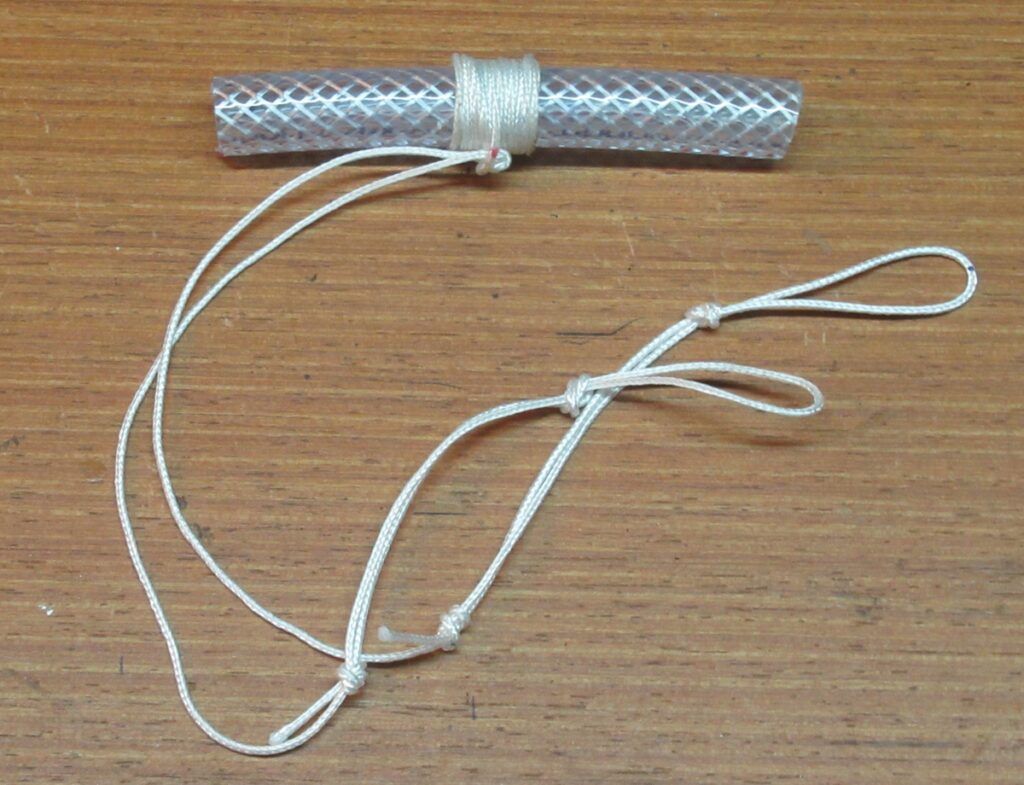 The reinforced plastic tubes have an American Whipping knot tied in the centre with two string ends that each have a loop followed by a strap (which in fact also is a loop). The strings have different length for the the different sizes of YangTze. |
|
 The reinforced plastic tube should be put firmly on the ends of two of the wing spars. The purpose of the tube is to join the wing tips, and the strings, which have a loop and a strap in the end, are for tauten the sail edge towards the wing tip by sliding the loop over a knot on a bungee. |  Not required. |
| Assembling the YangTze | |
1. Flatten out the head sail and have the spars ready. The longest spar is a rod and is for the spine. The other four are for the wings. Inside the sleeves for the cross spars there are centre spars with ferrules in each end. | 2. One end on each of the four wing spar tubes is reinforced with an internal rod, 10 cm long. This end is the one that should be inserted in the ferrule. |
3. Insert the reinforced end of one wing spar in the rear sleeve and make sure it is inserted into the bottom of the ferrule. | 4. Insert the rest of the wing spars in the same way. The reinforced tube for joining the spars is on the rear wing spars. |
5. Insert the spine rod in the front T connector. | 6. The rear T connector is cut off to allow the spine spar to precisely slide in. |
7. Spine spar properly inserted in rear T connector. | 8. On one side: bend the wing spars so the ends meet and insert the 'free' spar into the other end of the reinforced plastic tube. |
9. The wing spars should be pushed in as deep as possible into the tube. | 10.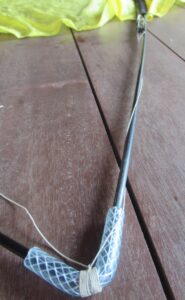 On the rear wing spar: wind the tension string two (or more if required) rounds around the spar and slide the locking loop over the knot on the bungee. |
11. The loop on the tension string has a strap to make it easier to pull the loop over the bungee knot, and to release the loop from the knot when packing up. |
|
12. Join the wing spars on the other side in the same way. | 13.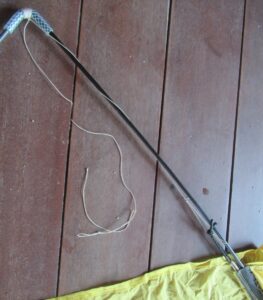 Wind the tension string two (or more if required) rounds around the rear spar and slide the locking loop over the knot on the bungee. |
14. In the same way: wind the tension string two (or more if required) rounds around the front spar and slide the locking loop over the knot on the bungee. Do the same for the other side of the front spar. | 15.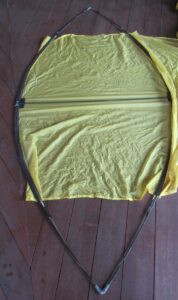 All tension strings applied. |
16. Check that the T connectors (both front and rear) are exactly in the middle between the holes for the bridle. | |
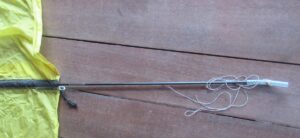
17. Assembling finished! |
|